Inspecting the Distributor Cap & Rotor
*MEDIUM*
You should inspect the distributor cap and rotor annually according to the following procedure:
- Park the vehicle on level ground with the engine OFF, the parking brake engaged, and the transmission in PARK (for automatic) or REVERSE (for manual). Raise the hood.
- Identify the distributor cap.
All spark plug wires from your engine are connected to the distributor cap. If your distributor cap has a rubber cover, remove the cover. - Loosen the spring clips or screws that attach the distributor cap to the distributor base by using a screwdriver. Pull the distributor cap straight off the base and set it nearby. Do not disconnect any spark plug wires from the cap.
- If the interior of your distributor assembly (with rotor) is dirty, blow it clean with a can of compressed air or air from a bicycle pump. Use a damp cloth to clean inside the distributor cap. Dry it with compressed air.
- Inspect the inside of the distributor cap under a bright light for defects such as moisture, hairline cracks, burned contacts, carbon tracks (paths), and burned, eroded, or dirty insert terminals. If any of these defects exists, you must replace the distributor cap, since these defects cause high voltage leaks, high resistance or failure. The result is misfiring or no operation at all. If the cap is free of faults, it can be reused. Note that dielectric compound appears as a deposit on the cap and rotor electrodes while it ages. This condition is normal and harmless; it should not be the sole reason for replacing the distributor cap and rotor.
- Remove each spark plug wire from its distributor cap tower to be certain the tower is not eroded, then reconnect the spark plug wire. Repeat for each spark plug wire. If any tower is eroded, the cap should be replaced as well.
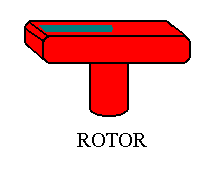
- Next, remove the rotor by lifting it straight up and off the distributor.
If it is retained by a screw, remove the screw first.
- Clean the rotor with a damp cloth and dry it with compressed air. Inspect the rotor under a bright light for defects such as cracks, carbon tracks, chips, fractures, burns, corroded tip, or weak tension in contact. If any of these defects exists, you should replace the rotor. If the rotor is free of defects, it may be reused.
- Apply a thin (about 1/32") layer of dielectric compound to the entire surface of the metal electrode at end of rotor blade. Do so whether the rotor is new or used.
- Install the new or used rotor in the same position from which it was removed within the distributor assembly. Tighten the rotor screw if one is provided. Replace the distributor cap in the previous position and tighten the spring clips or screws. Make certain the spark plug wires are firmly attached to the distributor cap.
- Identify your ignition coil; the wire in center of distributor cap will be connected to the coil. If the coil is dirty, clean it with a damp cloth and soapy water. Wipe off all water and let it air dry. Make sure all wire connections are tight.
- Close the hood and start the engine to be sure distributor cap and rotor are properly working.

